数据下钻
本例中我们将制作一个可以下钻的自定义组件。
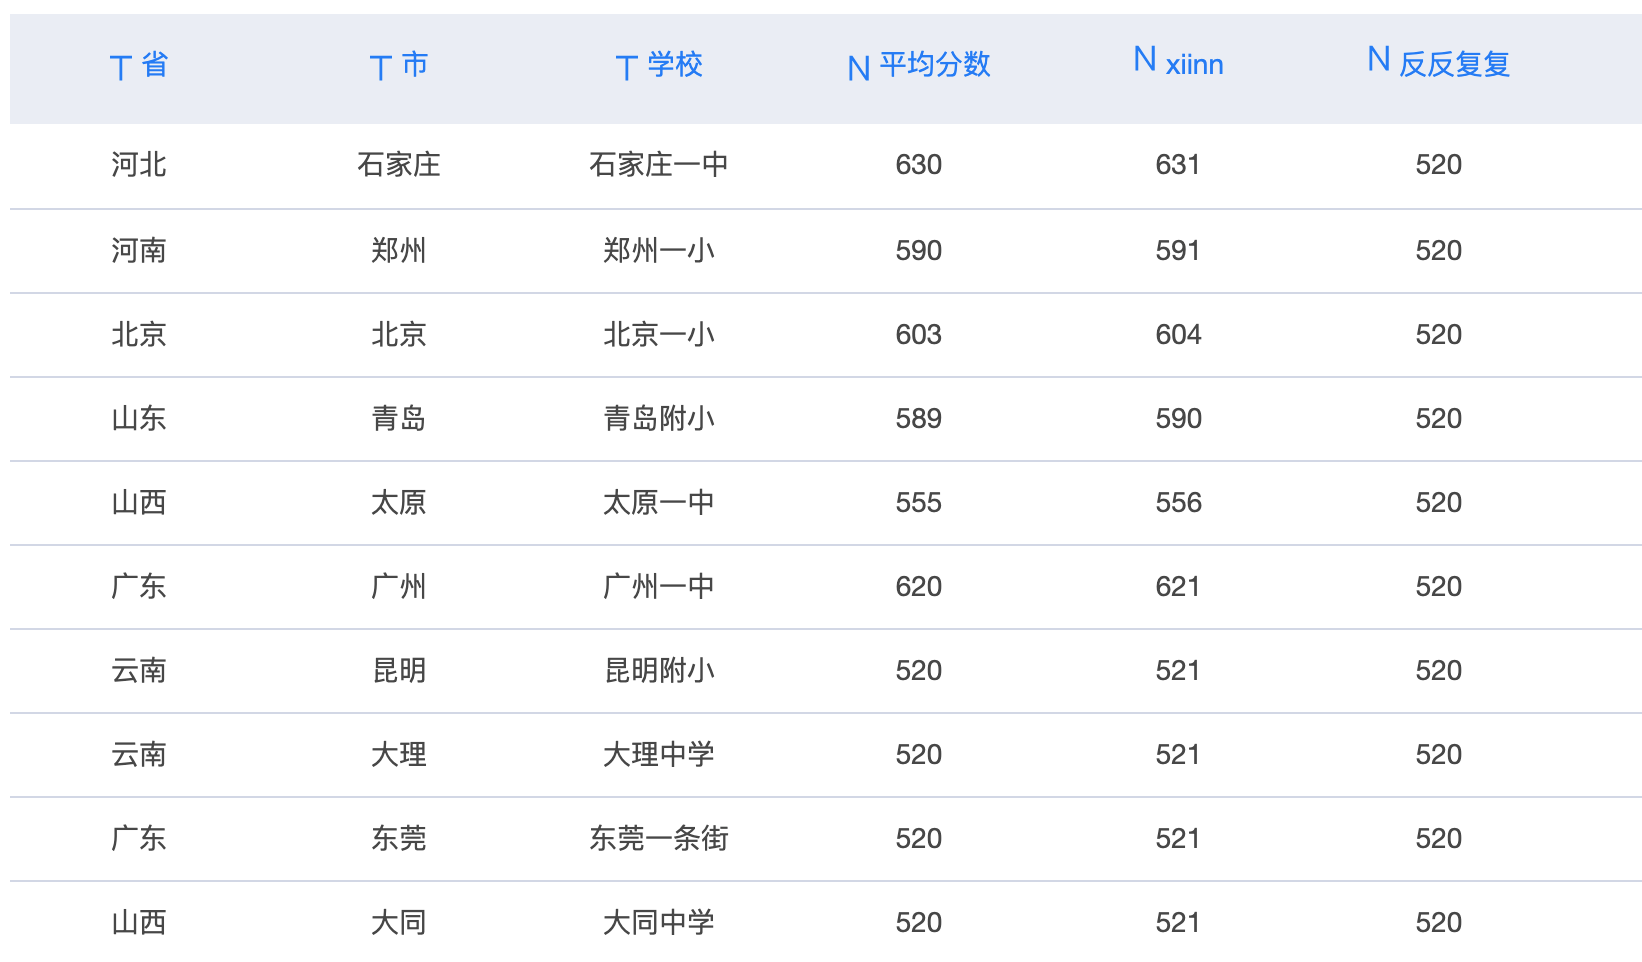
首先我们需要准备一个可以下钻的excel数据源,例如:
然后需要对数据下钻的操作有一定了解,点击这里查看数据下钻相关的内容介绍
接下来我们开始开发自定义组件,本例中我们制作一个表格,为了快速开发,我们暂时引用了vuejs,帮我实现双向绑定。
config.json
系统默认创建的文件,不包含index.css文件,这里我们需要更改样式,所以需要手动创建css文件。
index.css
我们配置了$customService,并在libs中引入了vuejs。
想要进行关联,必须添加参与组件过滤属性栏组件。
index.html
main.js
添加完$customService的引用后,我们可以初始化vue的代码。这里需要注意,在libs中引入的第三方库,不需要声明。
首先我们需要添加一个对象,用来存放在html上渲染的数据。
接下来先对返回数据进行处理。
我们通过$customService的getDataSourceDimensionColumns方法获取到了维度列表,这里的数组长度为1。
然后我们找到 type类型为drill-folder的那一项,表明该维度是可以下钻的。
- type drill-folder表明该维度是下钻目录.
- index 该项下的index表明下钻到了第几层。
- list 中存储着可以下钻的维度列表。
接下来调整html代码
index.html
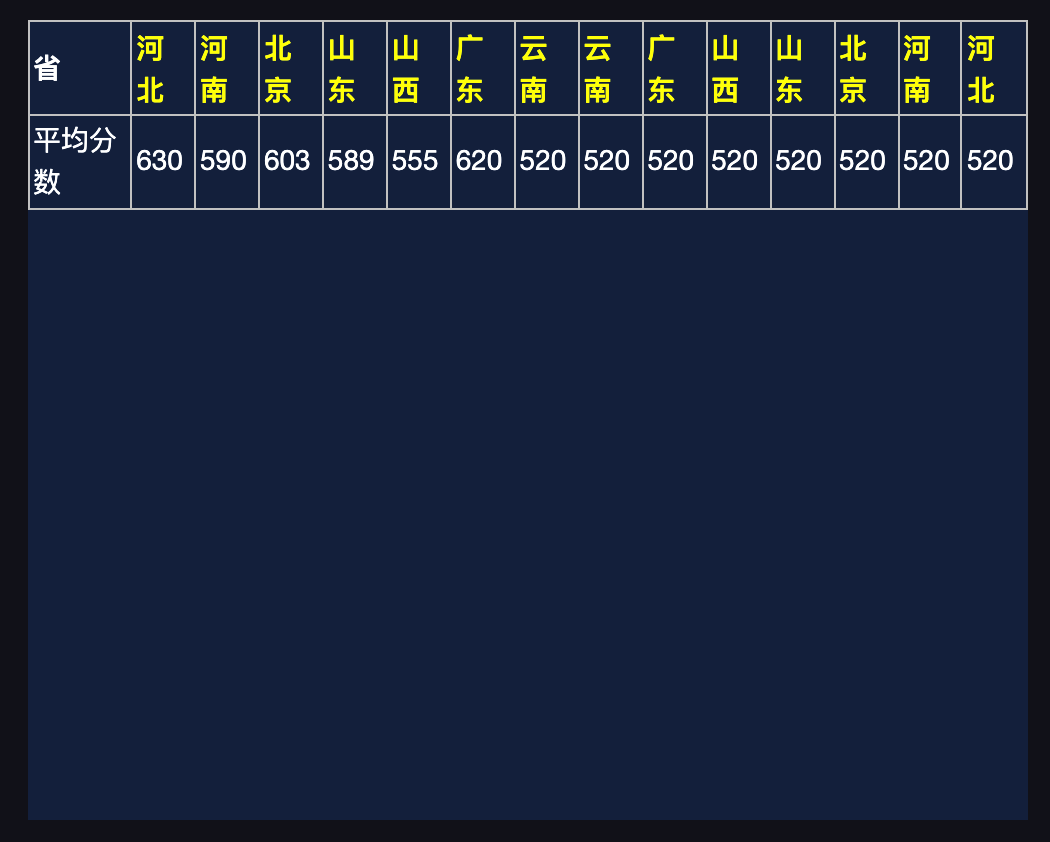
这个时候点击运行,连接上数据源,可以看到数据显示了。
下面我们添加下钻功能,在表头位置,我们加点击事件:v-on:click="drilldown(dimension,name)",在点击维度名称的时候,进行数据下钻。
修改main.js,需要注意的是我们绑定的是vue的点击事件,它的函数应该在vue的methods中,同时也应该注意this的指向。
我们在drilldown方法里调用了$customService中的multiDataSourceDrillDown方法。当我们点击维度后,它整理要展示的下钻参数,向后端重新发起请求。一般情况下,我们会再次在setData方法中获取到数据。
setData方法中我们通过$customService的getDataSourceDimensionColumns方法获取到了维度,需要注意的是,进行一次下钻后,index的值变为1
重新预览后,我们可以点击维度进行下钻了。
点击黄色的维度名称就可以下钻了
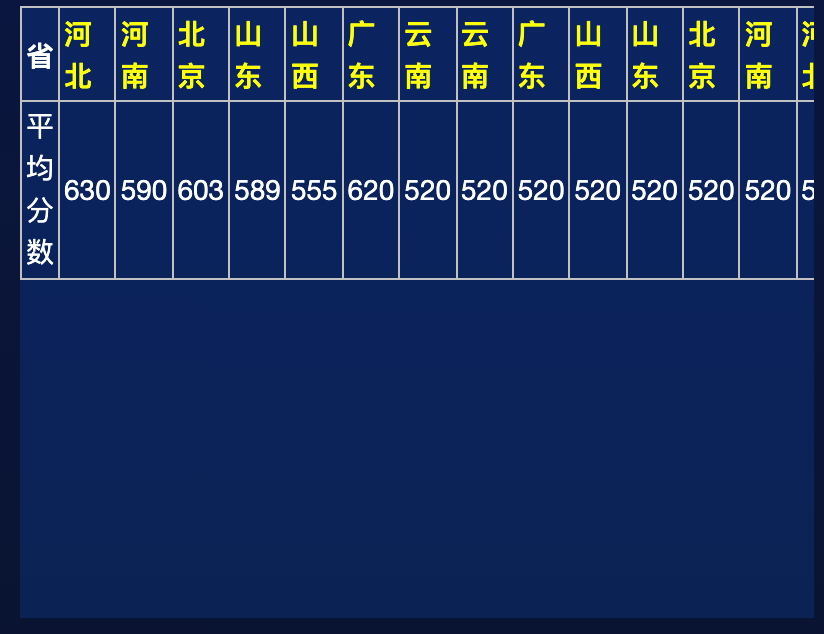
点击河北,之后会进行下钻。

加下来我们实现上钻功能,在index.html中添加上钻按钮。
index.html
在main.js中添加drillup方法,并且设置在$data下的table1中添加drillup变量,初始值为false,用来控制按钮的显示和隐藏。
drilldownIndex用来存储下钻的层级。
main.js
至此,上钻下钻功能开发完成。demo下载